How To Use Our Cloud Services
- Jonas Seidemann
- Guides
- February 8, 2024
Tl;dr
You can try out our Cloud Services today, for free, and it’s very easy!
- Grab a Raspberry Pi and an Ethernet cable
- Head over to https://app.alpico.io
- Create an Account
- Download personalized image and flash it onto an SD-Card
- Upload and Deploy Tasks from the UI
Table of Contents
- Create an Account
- Create a new Fleet
- Create a new Image
- Install on Raspberry Pi
- Set Up Your Raspberry Pi
- Deploy Your First Task
1. Create an Account
In order to use our Cloud Services, you will have to create an account. Simply head over to our Web App and choose a username. Type in your desired username and hit Submit to create it.
 You will be asked to provide a password to protect your account and an email-address.

And with that, you have successfully created an account and are ready to use our cloud services!
2. Create a new Fleet
You will find yourself on the main page, there is not much happening here (yet!), we will have to create a fleet first!
Tip
A fleet is a group of devices that share configurations, operating system and tasks.
You can either hit the fleet button, or use the navigation bar to go to the fleets

Start creating your first fleet by giving it a name and a description (this can be changed later)

Your new fleet will show up in the fleet list, take a look at it by hitting the View button.
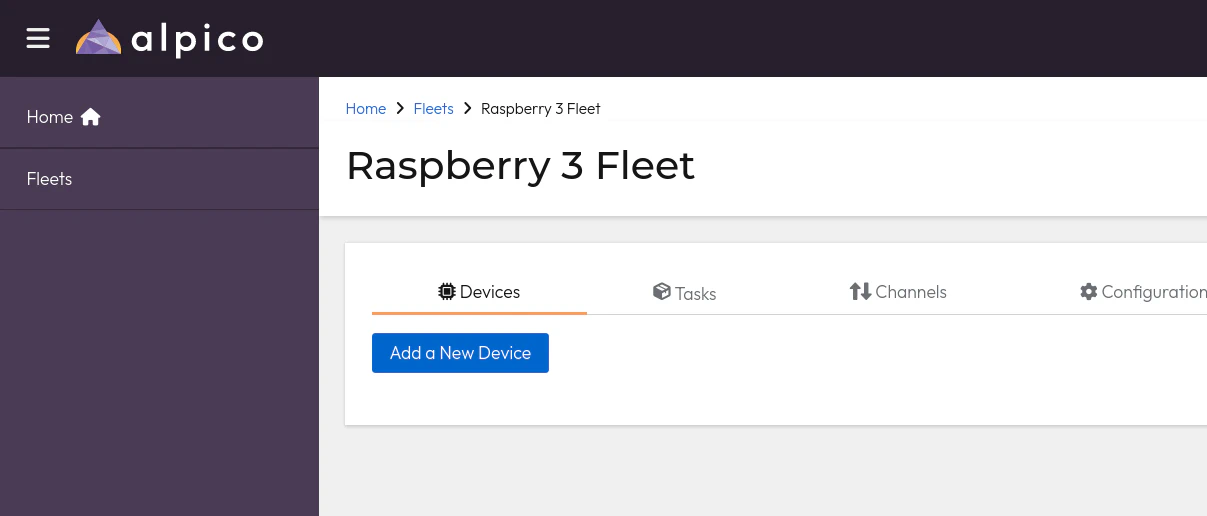
In the next step, we will create an image and enroll our first device into this fleet.
3. Create a new Image
In order to enroll your devices into a fleet, you will need to create an image.
Tip
alpico is using a lightweight Linux image that connects to our cloud services

You have the choice to download one of the following
- Raspberry Pi 3 image (for use with Raspberry Pi 3A+/B/B+)
- Raspberry Pi 4 image (for use with Raspberry Pi 4B)
- Not recommended: Generic text file (can be used to manually configure the daemon)
Just hit Download to create a custom image and download it. With our brand-new image at hand, we are ready to deploy it on a single device, or multiple devices.
4. Install on Raspberry Pi
Firstly, we flash the image to the SD-Card. You can do this with your favorite tool (we are recommending Raspberry Pi Imager) or through your shell.
Using the Raspberry Pi Imager is relatively straightforward. Just download the tool and start it.
- Under “Raspberry Pi Device” you can choose “No filtering”
- For “Operating System”, scroll all the way to the bottom of the list and choose “Use custom”, then select the .img file you just downloaded
- Lastly, select your SD-Card under “Storage”
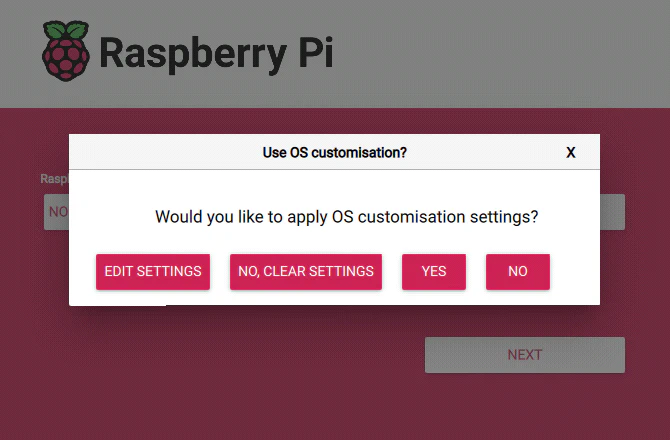
Use of Customization
Because of how we append our software to the image, it is currently not possible to customize the operating system further in the imager tool. Doing so will fail the flashing process. Make sure to select NO when asked about customization!
After flashing the SD-Card and verifying the image, we are ready to move on to starting the Raspberry Pi and enrolling them into our Web App.
5. Set Up Your Raspberry Pi
Put the SD-Card into your device and connect it to the internet using an Ethernet cable.
Once the device has booted (~10 seconds), it will show up in our fleet under the devices tab:
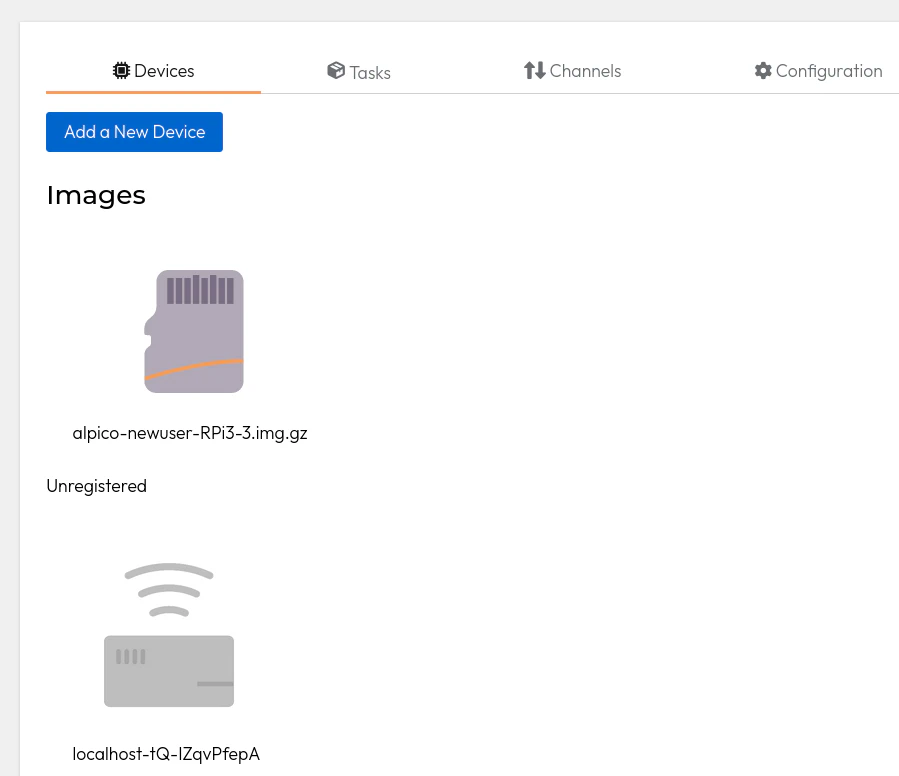
Click on the device and accept it to the fleet

Now the device is enrolled into the fleet and is ready to receive tasks, and send telemetry data back to the Web App
6. Deploy Your First Task
Let’s deploy our first task!
In the fleet view, head over to the “Task” tab and create a new task. For now, we will simply run a “Splash” task on the device. This task requires you to provide a URL to a .ppm picture. You can use our example picture by providing this URL:
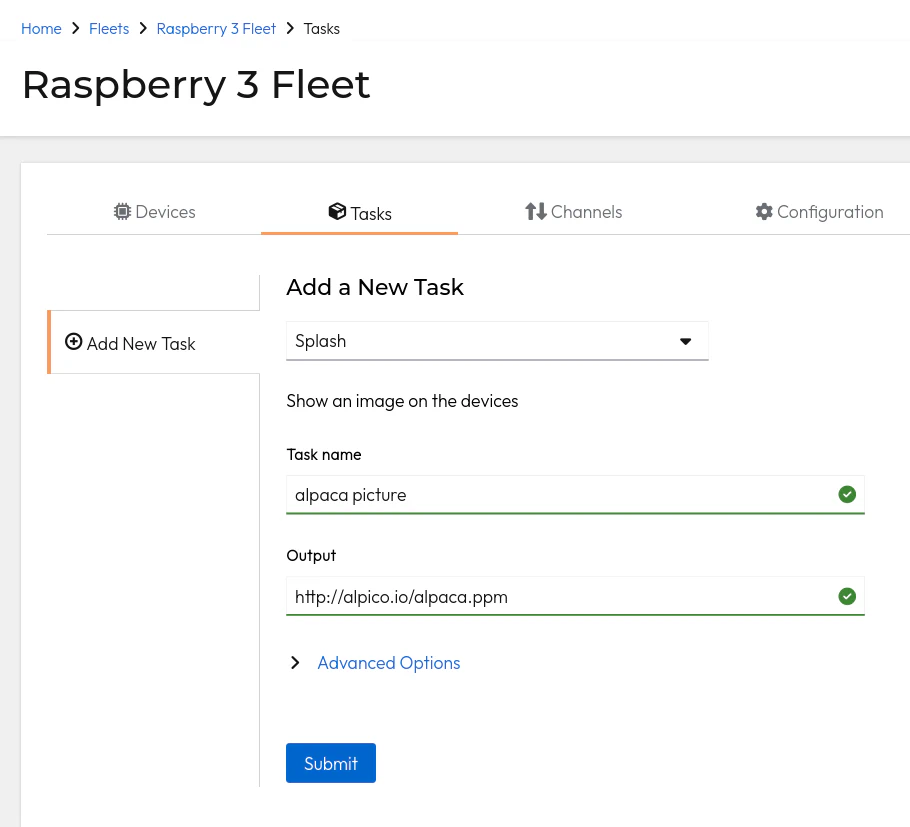
After hitting Submit the task will run on the device and the Raspberry Pi will display a very cute alpaca! Using tasks, you will be able to deploy lots of software in the future and have fine-grained control over what’s running on your devices. Stay tuned for more!